
Orca Slicer 2025 filescr is advanced 3D printing software that helps in getting a high-quality representation of complex 3D models with clear definition of details as wished. It is unique because, unlike any other 3D printing software in the market, what makes this software stand out is its friendly interface.
This article will discuss about Orca Slicer. We will cover its features, benefits, and working principle. We will also review its alternatives. This will give you complete information about the software.

Overview of Orca Slicer 2025
Orca Slicer is totally free, open-source 3D printing software. The purpose of this software is the slicing of the given 3D models for printing. It breaks up your 3D models into layered sections that allows the 3D printer to print this.
It is software specifically designed for those who would want to create better 3D models and wish to have software which is fast, reliable, and intuitive for their use.
Key features of Orca slicer

Orca Slicer is one of the new 3D printing softwares whose comfort, high quality, and speed are at its best. Having many features, it outstands to be the best for those who love to model and print 3D. Below is a complete description of every feature:
1. Intuitive interface
- The Orca Slicer has one of the simplest, easiest UIs. It makes it easy for new and experienced users to use it.
- The wizards for new users will guide you through every step, from the loading of the model up to the generation of a G-code file.
- Experienced users will find all kinds of advanced settings and features that they can use to meet their needs.
2. Support for multiple printers
- A unique aspect of the Orca Slicer is its compatibility with various 3D printing technologies, including FDM and SLA.
- Whether it is a home printer or even an industrial-grade, it is suitable for all printers.
- The printers are easy to integrate. Orca Slicer identifies the printer settings automatically.
3. Advanced slicing algorithms
- Orca Slicer uses high slicing algorithms that are used to divide the models according to optimal layers.
- High-quality prints: Your models, no matter how fine the details of them, will clearly print.
- Algorithms ensure that any layer is evenly strong and also free of defects in the model.
4. Material Optimization
- It provides various choices for improved usage of the material during printing.
- Material Saving: It reduces the amount of material used for printing and thus saves costs.
- Efficient Prints: Using the material well would improve the prints’ strength and quality.
- Moreover, it is an eco-friendly model because there’s going to be fewer leftovers.
5. 3D Model Editor tool
- The Orca Slicer has model editing tools. You can add them to your models before printing.
- Model Adjustment: You can rotate the model, resize it, and make necessary changes.
- Advanced Editing: The software allows for excellent subtle changes on complicated models.
- Automatic error correction in case any error has been done in your model.
6. Light and Quick
- Orca Slicer is a rather light software that does not place any greater load on your system and works at high speed.
- High Processing Speed: The software cuts models fast and generates G-code files.
- Consumes Low Resource Requirement: It consumes less RAM and CPU to allow you to do many other things at the same time.
- Time saving: Its high speed cuts down your time of printing.
7. Cross-Platform Support
- Orca Slicer can be accessed on different apparatuses, so you could use it on your favorite device.
- Windows: Available for Windows users with full support.
- Mac: It also comes with a specific version for Mac.
- There is also a Linux version for open source users.
- Consistency: Interface and facilities are the same on all the platforms, thus shift is easy by the users.
Major advantages of Orca Slicer :
Orca Slicer represents a great new software in 3D printing, offering users numerous benefits. The software is unique because its open source version is free. It assures users that it will not compromise fast print quality. The benefits of using Orca Slicer are briefly explained as follows:
1. Saves Time
- Perhaps the finest treasure of this modern era is time, but Orca Slicer really saves it.
- It renders G-code files pretty fast, since modern algorithms are used that play an essential role in 3D printing.
- Complex models: It distributes layers efficiently, even for complex models, without wasting time.
- Easy workflow: the help of the user interface and features shall enable you to achieve more projects within fewer days.
- Result; You would be able to spend more time printing models and other projects.
2. Excellent print quality
- Orca Slicer’s technology is cutting-edge. It ensures high-quality prints, vital to a project’s success.
- Algorithms filter the minutest details in the model, thus making the print highly excellent.
- The program sectionally breaks up the models into layers that are strong and uniform so that your prints do not disintegrate.
- With such excellent quality, the projects look far more professional and reliable.
3. Free and open source:
- No subscriptions or sales are needed to make use of the Orca Slicer; it is entirely free.
- Users don’t need to pay a single penny for its features-it is free of cost.
- Open source freedom: Since this is open source, it allows you to amend freely as you please.
- Upgradeability: The community and experts keep the software up-to-date. This gives users upgraded features.
4. Community:
- Being an open source software, there is an increased and lively community for Orca Slicer, so, in that way, it becomes much more practical.
- If problems arise when the software is accessed, then you have guidance from forums and groups of the community.
- New Ideas: New ideas and tips from other users build up the quality of your printing experience.
- The community quickly fixes bugs in the software to provide the users with the best experience.
5. Minimized Waste
- This software is great for eco-friendly printing as it minimizes material waste.
- It computes the precise quantity of material used in any print, along with total minimization of waste.
- Prints at a lesser cost: The waste material is also reduced hence saving on printing costs.
- It reduces litter that would encourage adverse environmental impacts since less litter exists around the physical environment.
Use of Orca Slicer 2025: The Definitive Guide
Orca Slicer is one of the most powerful 3D printing software varieties. Such a model will allow you to work with models effectively, and, at the same time, it enables sending files in a perfect format to be printed. Of course, such software is rather easy to learn, and for those who are going to master 3D printing or have just started with it, it will be quite an easy thing. Here is a detailed and step-by-step guide on how to use it:

1. Download and Install Orca Slicer Software
Configuring the use of Orca Slicer takes just that step of downloading and installing it to your gadget.
Download Orca Slicer:
- You should visit the Orca Slicer site, download the Orca Slicer app according to the OS of your device: Windows, macOS, or Linux.
- Because this software is open source, you will not need to pay one cent, so there will be no registration or purchases.
- Follow the installation guidelines:
- Once downloaded, open the installer file.
- The installing program then gives permission to install the software on your device. Follow the wizard’s instructions.
- Launch the software after its installation is complete.
Note: It may prompt you to set some defaults the first time you open it. This includes your printer and printing profile.
2. Load 3D Model
- First of all, you upload your 3D model to the software which would establish your project ready for printing.
- Import the model:
- Click the “Import, Open, or similar button and then select your .3DS file to import from your computer.”.
- The Orca Slicer accepts widely used STL, OBJ, AMF, and 3MF file formats.
Model Answer:
- The model is loaded into the workspace during runtime.
- Use the tools with zooming, rotating and panning to study the model.
3. Set the print options
It’s very relevant because one enters most settings here, depending on the quality of printing and material.
Layer thickness:
I set the layer thickness to finer details on print. The thinner layers it is able to print mean more details but takes longer.
Infill density
Fill the inside of the model with this amount of cement, lower percent to be lighter, and a higher percent to make it more solid.
Select Material:
- Finally, select material which delivers great performance for your type of 3D printer, such as PLA, ABS or PETG.
- Set the temperature and other parameters for the material.
Print Profile:
If you have an existing printer profile choose one or create a new profile if you don’t.
4. Cut the Model
The first step is to get the model ready and place it according to printing; then you can set the slice and print it in layers later.
Click the Slice button:
- The interface window of this program displays the button itself, which makes correct.
- Furthermore, cutting is also another option if the situation is not appropriate for printing. The program will carry out the operation and produce a G-code file by itself.
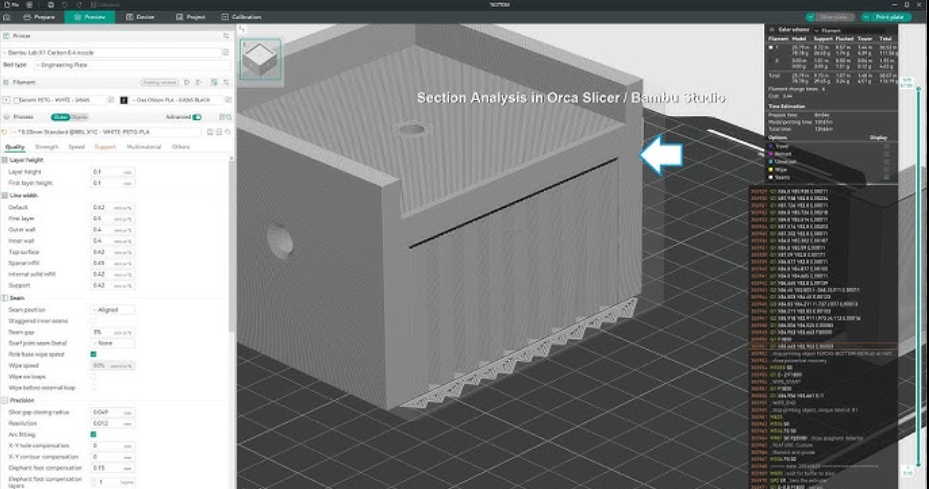
Valid
In the popup window, you will be able to see the X-ray views of the various object layers at the end of the cutting procedure. If the new plates in the cutting machine are misaligned or the wrong material was chosen, he can use his tool to select another setting and then jump to the next one.
5. Save the document to the printer
In a situation where the perfect layering has been achieved yet, then, export this G- code file in your 3D printer to get the layers cutting.
Save the file
- Export your G-code file by tapping the “Export” button in your workspace, and it will then automatically save the file to the computer.
- Copy the file to the SD card or USB if your printer has one.
Print Release:
- Through the transferring of the G-code file to the 3D printer.
- So, we should make a start and keep our eye on this model until it is finished.
- Another procedure is throwing in:
- Put the model in the right place on the plate
- Direct the model in the workspace and make sure it is still during the printing.
Settings To Try
- Firstly, the application of different settings to different projects gives the best results.
- Ensure printer calibration:
- Correct calibration of the printer results in more quality prints.
Read the text:
Apply the heat and other parameters according to the type of material.
System Requirements
minimum and recommended system requirements for Orca Slicer:
Minimum System Requirements:
- OS: Windows 7/8/10/11, macOS, or Linux
- Processor: Dual-core CPU, 2.0 GHz or higher
- RAM: 4 GB
- Graphics: OpenGL 3.3 compatible GPU
- Storage: 500 MB of free disk space
- Other: USB or internet connection for updates and printer communication
Recommended System Requirements:
- OS: Windows 10/11, macOS, or Linux
- Processor: Quad-core CPU, 3.0 GHz or higher
- RAM: 8 GB or more
- Graphics: Dedicated GPU with OpenGL 4.5 or higher support
- Storage: 1 GB or more of free disk space
- Other: Stable internet connection for updates, cloud support, and printer management
